- Bill Clinton
Setting a secure site and SSL encryption is not that hard, but it can be extremely confusing and frustrating. After going through some internet self-help posts and Youtube videos on how to set-up a SSL secured site. I decided to write my own version on the topic, hopefully covering all things that I find extremely useful but somehow was not mention in the tutorial or videos.
First thing first, this tutorial is written based on Cpanel and a shared hosting server. So things might be (definitely) different if you are on a different website manager system.
First thing first, is it really necessary to secure a site? If it's just for information where you don't deal with people's private information. No, you don't need it, but if your site has a on-line store or a registration service for whatever reason, it is in good faith that you secure the site, making sure all transaction is being encrypted. Nowadays most internet browsers have an embedded security check where it will tell user whether they are browsing through a secured site or not, whether their information can be send across safely or they is a possibility somebody hijacking the information.
If you are hosting some Facebook apps and landing page, starting September 2011, Facebook requires all landing pages and facebook's apps to be hosted on some secured site. So instead of http, they want the https url. If its not something important you can use some free https url provider.
You can generate your own SSL certificate, but that is not something that is recognize by the security authority. What is SSL, how it works and all the other definition stuff can be look up somewhere...so I'm not going to write about it
So lets get cranking.
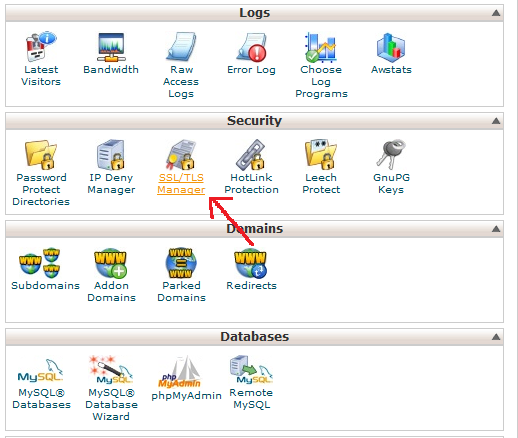
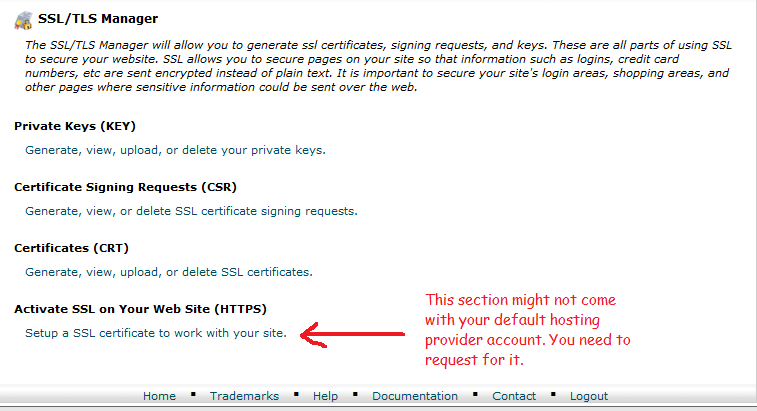
1. Login into your Cpanel and search for the SSL/ TLS manager in the security tab. (Some hosting provider give it to you right from the beginning, but some don't, so you need to write a ticket to your hosting provider asking them to enable the manager. They usually enable it for free without much hassle.
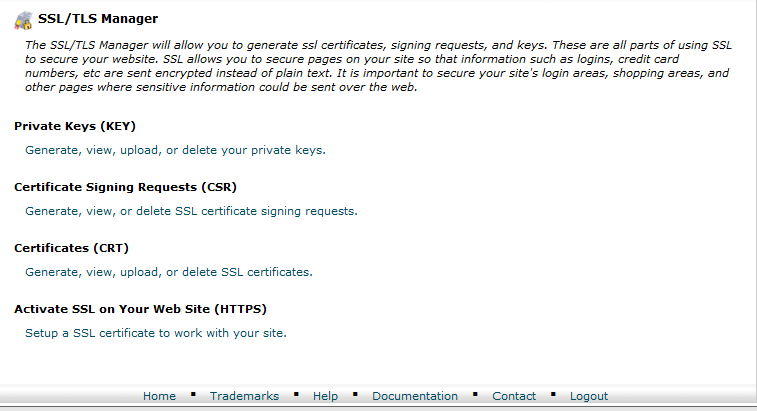
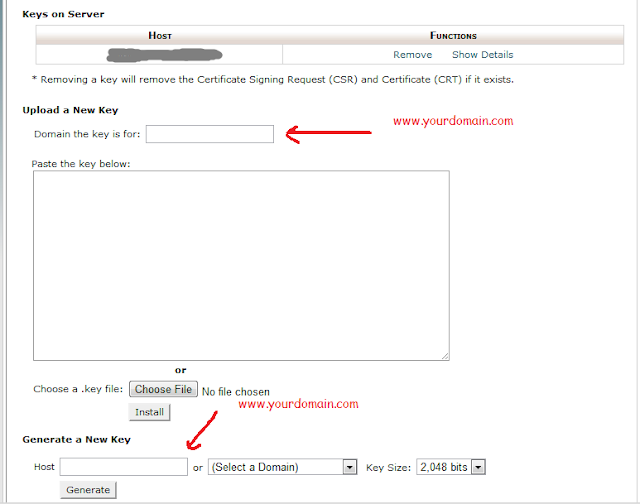
2. Now go to Private Keys (KEY) section to generate some key which will later be use to ask for SSL certificate from SSL certificate authority. Just fill in the domain you want to secure and press generate. Copy the key into your text editor. You can choose 1024, 2048 or 4096 bit encryption.
4. Copy the code into you text editor and save it.
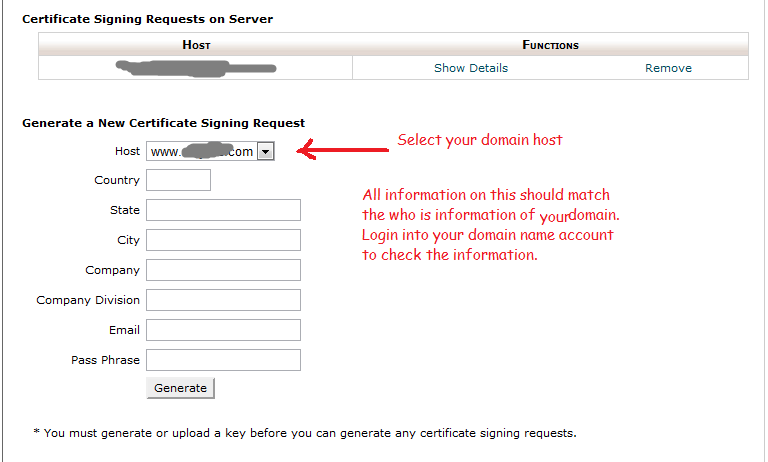
5. Next, we need to generate the Certificate Signing Request (CSR), this is where you need to be extra careful because the information you provided here will be use to authenticate you SSL request, therefore, all information of the domain which the SSL certificate being requested for should match the whois information. The name, registrant email, country and company need to be the one in the domain who is information. You can check it through whois checker or just log-into your domain account.
Company division is not that important, but everything else should match. The password is not the password of your domain, but a new password you created specifically to encrypt the site. Make is as hardest as possible. Country and state should be in 2 character ISO code.
Click generate, copy the code into your text editor and save it.
6. If your hosting company allows it, you can navigate from your file manager on Cpanel to the upper than public_html folder level. There you can find a SSL folder, inside it another 2 folders named certs and keys. You can choose to download that instead of saving it from you text editor.
7. Now come the not free part, you need to buy a SSL certificate for SSL authority, you can buy it directly from you hosting company of any other company, the cheapest cost around USD 8.00 per year. You can see it here
8. Click buy, pay for it, fill it all the necessary information requested. You need they key, csr code and an administrator@yourdomain.com or other variation of the account and access to it in order to complete you SSL request. (or you need to tell whoever in-charge that you are requesting for SSL certificate and she/he needs to do her part in confirming it)

"I feel I'm able to serve my customer by knowing what she or he wants. One of the ways I'm able to do this is through my website, and email: people give me great ideas, tell me what they want, what they don't want. It's really instrumental, and helps me stay in touch with people"
- Kathy Ireland
9. It can takes from 1 up to 10 days to compete your SSL certificate request because the authority will need to cross check with a lot of other parties to make sure, your site information is correct.
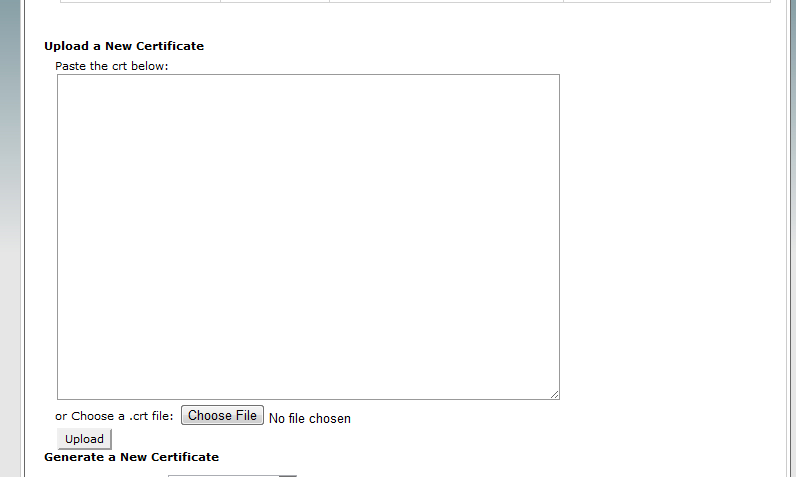
10. Once it's completed you will receive a notification email with the certificate and ca-bundle they called it. Unzip it and open the certificate with your text editor, or in Cpanel, inside the SSL/TLS manager > Certificates (CRT) there is an option to upload the certificate, or if you prefer, copy the code and paste it in the space provided.
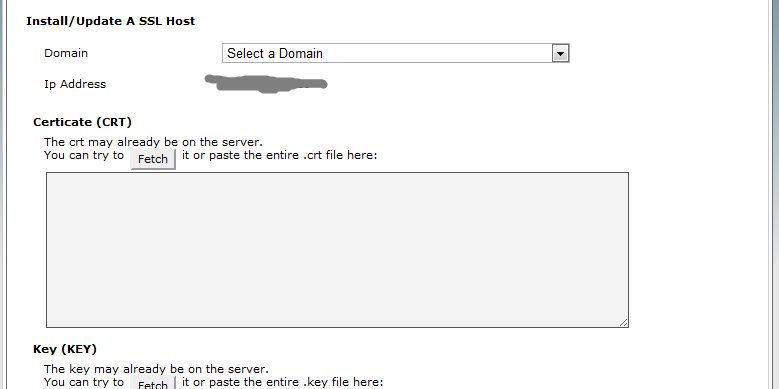
11. Are you done? Not yet, there are still a few step to take into consideration. Here it is, you need to upload the ca-bundle, so in Cpanel there is another option below certificates, it's the Activate SSL on your website. This option is usually not present in you default setting, do you need to request for it? Yes. but wait, for SSL to function, you need a dedicated IP address, so most probably you need to buy that from your hosting company.
You can either buy a dedicated IP before generating keys for SSL or you can buy it afterwards, IP address is not tied to your SSL certificate so it doesn't really matter. Based on my experience, you need to request for dedicated IP from your hosting company as they usually sell it as a bundle with SSL certificate, so to buy just the IP you need to ask them specifically for it.
Changing IP means, your site needs to be propagated through the big world wide web, so there will be a 24 hours blackout of your site after changing the IP address, but most probably you can still access you Cpanel.
10. Back to SSL/TLS manager in Cpanel, once your hosting company enable your Activate SSL on your website (HTPPS), you can upload the ca-bundle to inside it. Just copy and paste all the information in the right place.
That's it, your site is now secure. Hopefully this helps some of you out there, happy reading!
"I feel I'm able to serve my customer by knowing what she or he wants. One of the ways I'm able to do this is through my website, and email: people give me great ideas, tell me what they want, what they don't want. It's really instrumental, and helps me stay in touch with people"
- Kathy Ireland
0 comments:
Post a Comment