"A bus station is where a bus stops. A train station is where a train stops. On my desk, I have a work station.." - Anynomous
Today, in the mood for sharing information, I will write about creating an on-line form on the backs of Google Spreadsheet. Google Spreadsheet is great, you can share it with a lot of people but the downside of spreading the spreadsheet around is that all the information on that particular file will be shared along with the file. Sometimes you just want people to fill in certain information but you don't want them to know what's on the spreadsheet. So how do we get around doing it in Google Spreadsheet? easy, just use to form function that came with Google Docs.
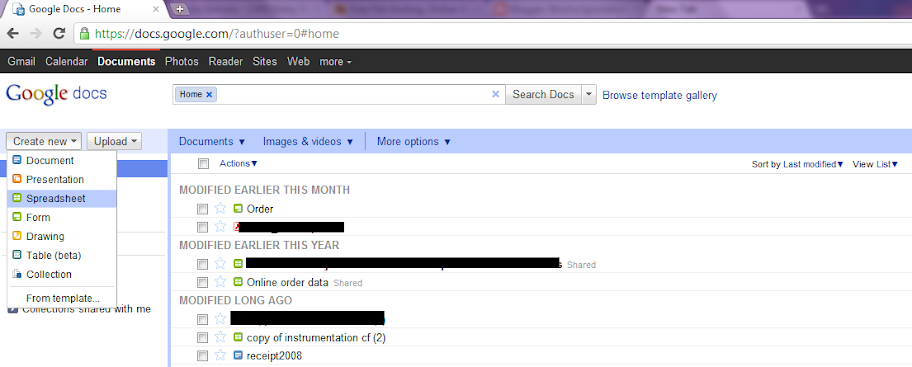
1. Create a new blank spreadsheet. In this example I will try to create a simple on-line contact form. Log-in into your Google Docs account go to Create New> Spreadsheet
2. Now we have a blank Google Spreadsheet, manoeuvre your mouse to Insert > Form. A pop-up window will show up, this is your form editing panel, it comes with a few basic type of form elements you can choose from. There are:
- Text
- Paragraph Text
- Multiple Choice
- Checkboxes
- Choose from list
- Scale
- Grid


3. From this point forward, it's very easy, every time you wish to add another element just go to Add Item > and pick the type of question you want.

Click Save once you completed the task.
4. Okay let say that I had a blog with list of of items for sale and I wanted to insert a contact form in it so customer can fill it in without the hassle of finding my email address and sending me an email. It can also make sure the customer fills in all the right information that I needed for the business. All I have to do is create the type of contact form I desire and embed the form on my blog.
5. Now Blogger has this feature where you can create static pages, (you can create up to 10 static pages on your blogspot blog). The easiest way to incorporate Google Spreadsheet Form within your blog is to go to More Action > Embed. Copy the code and paste it in your blog page. (All the hard work is now complete)![]()

So I've gone through all the process, see the sample of my Contact form here. Now people can fill in this form and only I can view all the information on it via Google Spreadsheet.
You can add fancy background to your form just go to Theme at the top of your form editing panel. If the form is too long, you can add page break to split the form into different pages. Just go to Add Item > Page Break
To edit what text users see after they fill in the form and sent it, you can edit the text at More Actions > Edit Confirmation

To make sure you receive notification every time people use your form go back to your Spreadsheet and select Tools > Notification Rules

"A bus is a vehicle that runs twice as fast when you are after it as when you are in it"- Anynomous
0 comments:
Post a Comment